Sunday 22 January 2012

Peachy!

This weeks "Gorgeous Gateaux" challenge from The Shabby Tea Room girls was indeed a challenging challenge with the requirement to use the colour combo of peach, lilac, pink and grey. Also to be used are lace and metal.

Here is my effort.


Believe it or not the torn paper piece with the words stamped on are washed in a very pale lilac acrylic paint - camera hsn't picked it up properly. I stamped it with grey, peach and pink ink with the words 'love' and 'divine'.

I embossed the cake shape with a cuttlebug polka dot embossing folder (and an, ahem, rolling pin).

I so loved the large peach flower in the inspiration photo I decided to make one myself. Didn't turn out too bad. I made it by painting tracing paper (for the right texture) with a wash of pale peach acrylic paint then using a flower punch to make some flower shapes which I then snipped a bit to make the petals a bit more spiky.

There is pink lace and for my metal embellishment I made a hat pin with lilac, pink and pearl beads on it and I twirled the wire stem of the pink rose.


The orange (variation on peach!) polka dot paper is from Making Memories Chloe's Closet.

All in all not quite gorgeous but it does have a cake on it!

Sunday 15 January 2012

Vintage Beautiful Boudoir Bliss

I've been so busy making other things I almost didn't make this challenge in time...


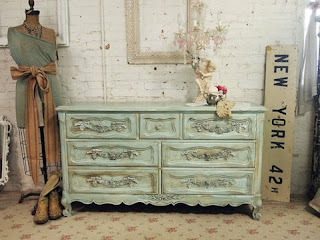
How timely and how beautiful this Shabby Tea Room inspiration photo is.

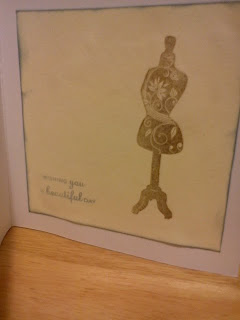
I recently got some free clear stamps with a craft magazine. It had a tailor's dummy in it which I couldn't wait to use.

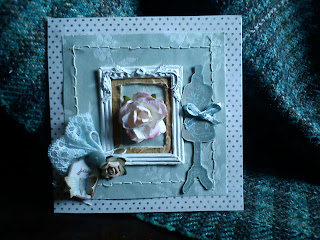
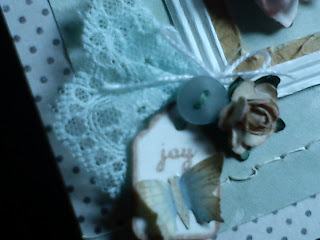
And since part of the challenge was to use a sewing related embellishment ...what better than a tailor's dummy. I printed it in bronze ink on some paper I had painted a sort of duck egg blue. Also included is a piece of lace and a button which I had which were the perfect colour. Of course, I also just had to use my Sew-Easy tool to make the holes for the sewing on the edge of the paper.


(the second photo was before it was assembled)

This photo shows more detail of stamp...


Unfortunately it doesn't feel like it will last long ...although it is a clear stamp it is very jelly-like and I am certain to break or damage it in some way ..if not from overuse. See I just had to use it inside the card as well!


The tag is a standard office supplies tag to which I added a punched butterfly stamped with a Kars butterfly stamp. Amazingly for those of us on a tight budget they do some small packs of stamps for a couple of pounds. I can't resist buying a new set each time I visit the craft shops.


The project was begging for one of those miniature white frame embellishments to be used as there are a couple of white ornate frames in the inspiration photo and also lots of ornate carving on the chest of drawers. Since I didn't have any of those frames and unlikely to get to the shops to buy one I decided to try to re-create similar using stuff I already had. So I used some finely corrugated card for the frame and for the ornate carving on the frame I used some plastic foliage which I once blagged from a homewares store. They were moving their display of artificial flowers and lots of bits had fallen on the floor and were being swept up ..so I asked if I could have some! I painted the whole thing with white acrylic paint and voila! you can almost hardly tell the difference.

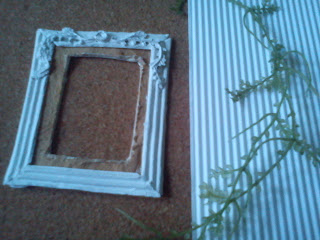
The 'canvas' background for the frame was something from an earlier experiment gone wrong (watercolour paper scrunched and stained with tea - see here) - never throw anything away!

Joy - the name of the woman whose boudoir this is has done some altered art herself and cut out the original picture from the frame and placed in a rose - something which she clearly loves.

I love these roses - they look good enough to eat. The packet just bears a company sticker with 'Sweet Lilac' printed on it.

The polka dot paper is Melissa Frances Fifth Avenue and the other paper which is like an image of some fabric is Laura Ashley paper. The pink rose and the polka dot paper adds a hint of contrast colour to an otherwise almost monochromatic scheme.

All in all a fantastic challenge with a beautiful photo for inspiration. The photo shows a boudoir as it should be - beautiful and blissful and shabby and vintage all at the same time.

Christmas catch up

Just a few cards and wrappings I made over christmas...
...an old rose I made from crepe paper...


A gift bag I decorated with some Fifth Avenue paper, pink netting and some pink tinsel bought at reduced price...


A Christmas card..


Some food labels for mother's Christmas Eve buffet...


My Christmas tree from the garden (the top off one planted a few years ago)..


Didn't make these.. cute little glittery birds perched in my tree...


My brother's birthday card..


Inside birthday card..


Birthday pressie..


A thank you card...


A New Year card...


Another thank you card..

Sunday 1 January 2012

I hope 2012 is sweet for you

Over at The Shabby Tea Room the New Year challenge is to create a card or project on the theme of 'A Colorful and Shabby New Year' using the colours pink or red and green, blue and yellow with this photo as inspiration....

So to try to capture the sense of fun and exuberance in the image I created this ensemble for our New Year Celebration...

There's a goodie bag of sweets and a carton of juice to sweeten the party mood.

The stripeyness of the challenge photo just begged for the use of some Baker's string. Unfortunately I have been unable to source any locally so I used what was in a spare ironing board cover - red and white string is used in such covers to gather, tighten & secure the cover around the ironing board.

I did find however some cute yellow stripey buttons ideal for the project


The cute, cute clown is an image from The Graphics Fairy which you will see I have edited quite a bit. But he/she is just soooo cute.

The bag is my favourite thing to make - its an origami folded bag made with light green paper (though you can't really see it in the photo) with the front decorated. The handles on the bag were taken from another shop paper bag & re-used. I also added some crepe paper streamers inside the bag as extra decorative packaging.


I put sweets in a cellophane bag and added some paper to seal the bag. Inspired by some of the ideas in my Jan/Feb 2012 copy of Papercrafts magazine.


Somewhere, either in a mag or on a blog (if someone can point me in the direction I will add a link) the question has been posed as to what our favourite papercrafting tool is. Well, for me, although I only just got it, it has to be and I feel certain it will be in the future this Sew Easy Stitch Piercer. I love seeing the stitching on other people's projects but am not confident in my sewing skills nor my rickety old sewing machine to risk gorgeous papers being chewed to shreds in the process. This gadget pierces holes just in the right places for you to be able to handstitch using the holes. Simple but very effective!

All the challenge colours are there in the papers used which are appropriately enough Bo Bunny Sweet Tooth Collection (the wavy stripey one) and the polka dot one is from Melissa Frances' Kitschy Kitchen collection.

So much fun and colour I tried to incorporate I fear my project may just resemble a rather loud party. Great fun doing it though! Hope you all have fun too looking at it.