Take a bow everyone! (pardon bad word play)
The challenge criteria is to use one bow, two buttons and three punches (I do have that the right way round don't I?).
And such wonderful interpretation of the instructions the challenge has inspired! .. such as the buttons on the dolly bag by Mrs A.
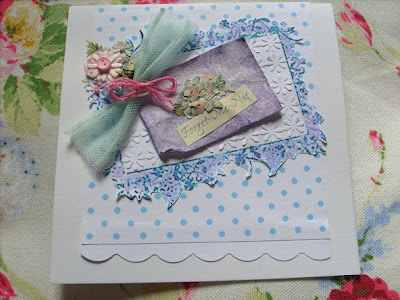
So here's my effort for this week (do scroll down for some of the ..ahem..finer details on the card)..

This card came into being through the product of a series of experiments as I try to learn some cardmaking techniques using alternative free stuff.
The design started off with the flowery frame thing which I printed off from some clipart on my computer. Unfortunately it printed off as blue-green ink as some of the ink on my printer was not coming through. So to hide the botch I softly coloured the border in with a purple pencil and quite liked the result.
The polka dot paper is also the result of the same printing accident! (I think it was meant to be pink)
I'm still learning at this and trying to do it on a low budget. Hopefully in time I will get better and build up a better collection of equipment. So for this card instead of having any embossing equipment I used a small flower punch with white paper and stuck the flowers also on white paper to try to create an embossed effect. So that was punch number 1.

Punch number 2 was another flower punch but slightly bigger and used it on some watercolour paper painted pink (more of which later).

The tiny green bits of foliage you can see I blagged off a local home furnishings store. They were changing their display of artificial flowers and in the moving there were loads of fallen bits of petal and stuff all over the floor so I took a tiny handful and asked if I could just have them.
Punch number 3 was a plain scallop. Look forward to purchasing in the future a fancier one.

The two buttons are at the top left corner of the frame (see flower detail pic above). One is the tiniest thing ever and was pulled off a birthday card I got last year. The other is a small pink oval button cut off an old cardigan (must stop cutting up my clothes I will have none left!).
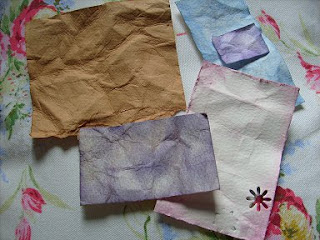
Another thing I have been experimenting with is how to get the distressed look without buying the distress inks (or at least not too many all at once). So I dug my very old set of acrylic paints out of the cupboard under the sink and some leftover watercolour paper from another cupboard. I washed the paper with very dilute acrylic paint and scrunched it up to make it crinkled and left it to dry. The brown coloured one was done with tea and ended up looking more like a chamois leather cloth than anything you might want to stick on a card! I have also read that you can get an aged look on paper by holding a flame under the paper. May leave that technique for a few weeks yet :O
I used the result to make the topper/sentiment for the card which is a forget-me-not image and words from a handily already vintage-look notelet sent to me by my mother (she also gave me a full pack of them so they may feature somewhat in the future!).


I may well fail the challenge on the one ribbon rule however. Couldn't make my mind up whether ribbon meant bow or just simply ribbon in which case my item of ribbon is a pale blue ribbon rose and was made last week in my ribbon rose learnings. But I also have a bow on it which is not ribbon but some pink embroidery thread which came with a cheapo template stitch thing which I picked up in a craft shop. And not content with one bow there is also a second bowish-shaped thing which is just the net bit off some mucky lace (hence cheap) (I think its meant to be pale blue) I purchased a couple of years ago for no other reason than it was cheap and quite pretty. So technically that's two bows and a ribbon which isn't a bow (see flower detail pic above). Ooh I'm tying myself in knots here on the ribbon-bow conundrum.
Anyway, I certainly had both fun and frustration experimenting and this great challenge gave me the opportunity to make some order out of the experimenting and accidental chaos!


